A quick explanation setting up and using our Load Balancer service.
Our platform allows you to seamlessly integrate Load Balancer services into your environment. This is especially useful when using clustered server environments or container infrastructures. Our Load Balancer service works on both Layer 4 and Layer 7 protocols, allowing almost any service and port to be balanced across multiple servers. Here's the table to compare all the benefits;
| L4 Protocol | L7 Protocol | |
|---|---|---|
| IP and Port Based Load Balancing | ✅ | ❌ |
| URL based Load Balancing | ❌ | ✅ |
| SSL Termination on Load Balancer | ❌ | ✅ |
| HTTP to HTTPS forwarding on Load Balancer | ❌ | ✅ |
| Let's encrypt integration | ❌ | ✅ |
| Upload your own SSL certificate | ❌ | ✅ |
| Forwarding based on URL | ❌ | ✅ |
| Maintenance Page function on HQ | ❌ | ✅ |
Set up Load Balancer on a device
Fill out initial info
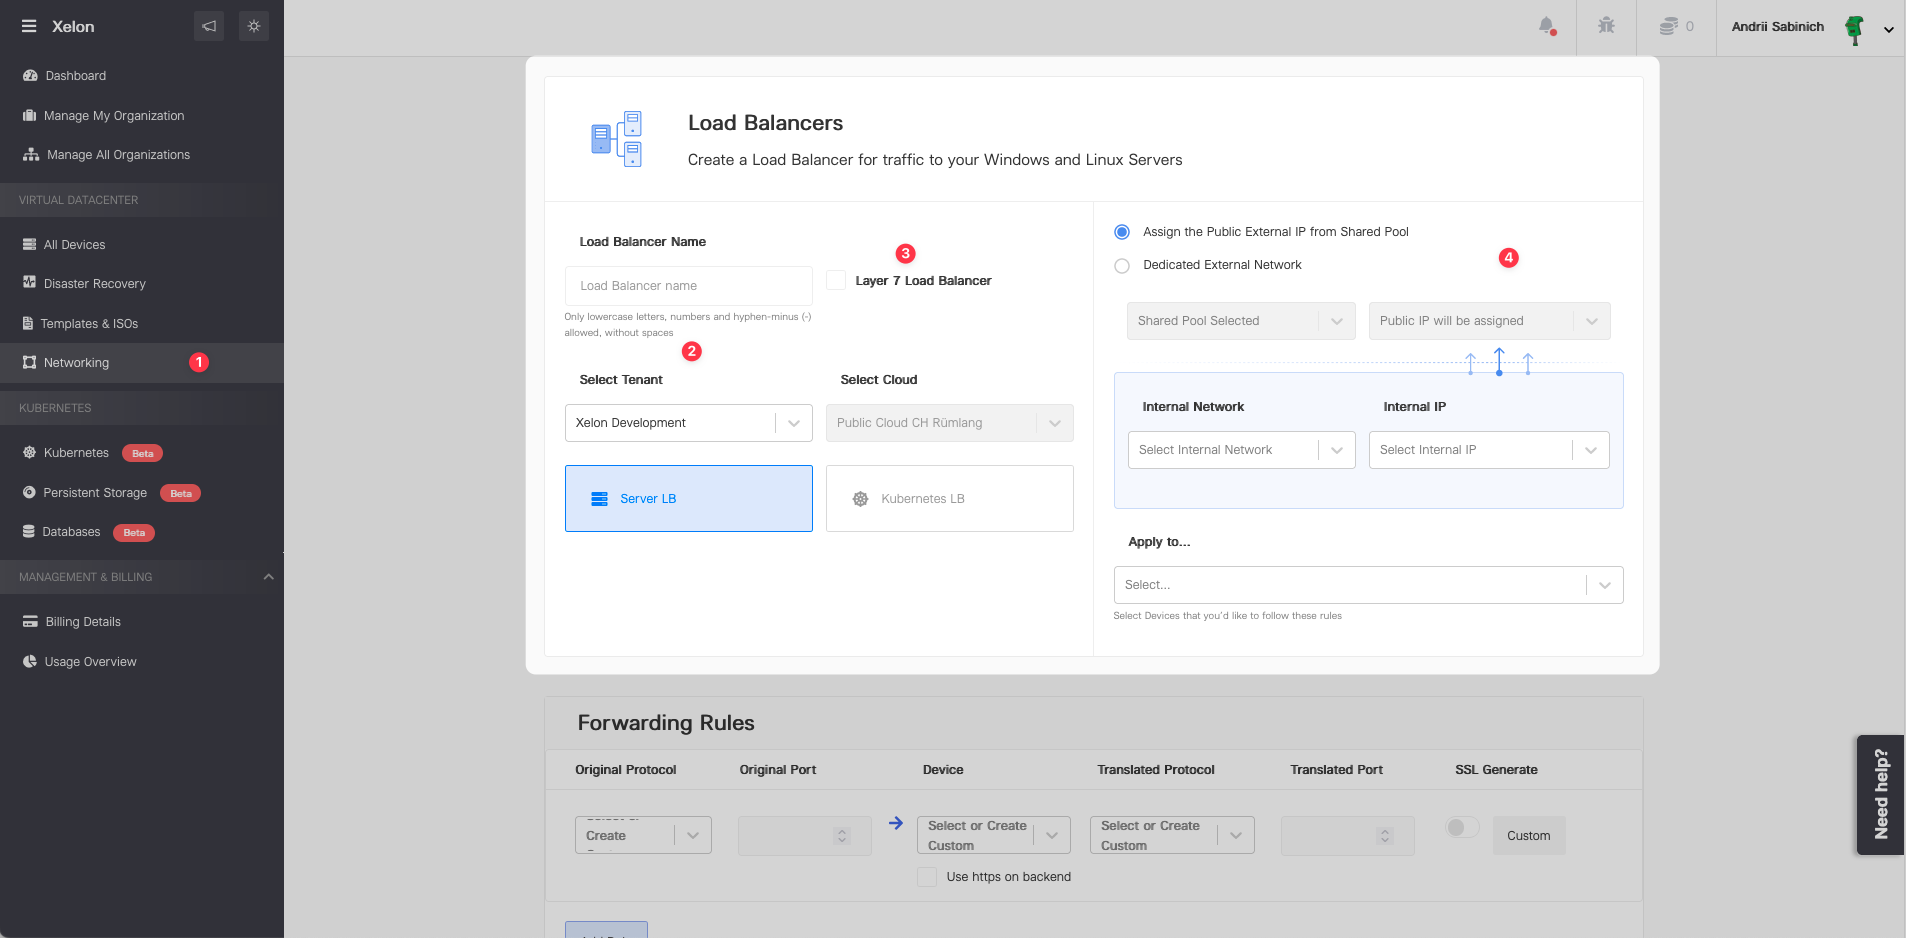
- Go to Networking page > Load Balancer tab > Create Load Balancer button
- Enter Load Balancer's name and select the related organization
- Tick the checkbox if you want to have a Layer 7 Load Balancer (otherwise, it will be Layer 4)
- Fill out the data from the right colum related to the internal networks and devices
Configure Forwarding Rules
Forwarding rules configuration correllates with the actual Load Balancing rules. Let's say you have two web servers that you would like to use as your upstream behind the Load Balancer. That's how your configuration should look:
Layer 4 Load Balancing

Original Protocol: https
Original Port: 443
Device: Select the internal webservers
Translated Protocol: https
Translated Port: 443
SSL Generate: Enable to generate a "Let's Encrypt" certificate automatically, or click Custom to upload your own one.
Layer 7 Load Balancing

URL: The URL that you want to handle
Use https on backend: Toggle on if back-end uses HTTPS
Maintenance page: Usually, stays disabled
SSL Generate: Enable to generate a "Let's Encrypt" certificate automatically, or click Custom to upload your own one.
After setting up all the configuration, click Deploy Load Balalancer. It will be available almost immediately since the deploy.
![]()
Manage Load Balancer
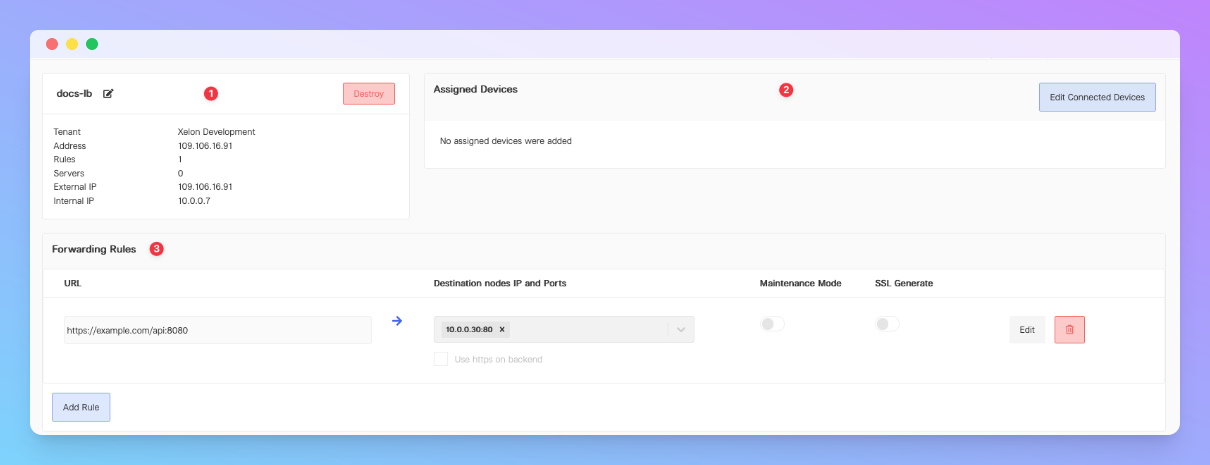
After the provisioning, you can access your Load Balancer by clicking on the needed one on the list. Here's how your dashboard look:
- Name, configuration, and IP settings of your Load Balancer.
- The list of devices assigned specifically to your Load Balancer.
- List of Forwarding Rules that can be expanded however you need.
How to work with other servers
Use the external IP of your firewall to connect to your internal services. Let's say you've configured an Layer 4 Load Balancer and a Forwarding rule for port 443 to access your internal web server farm. Now, open your browser and access https://<EXTERNAL_IP> to access your web server. If everything's good, you'll see the main page of your server. If not – let us know so that we'll help you.
If you have configured a Layer 7 Load Balancer for a specific domain such as https://www.xelon.io, traffic won't be forwarded if you open https://1.1.1.1 in your browser. Layer 7 Load Balancer checks the host header, and only forwards the exact URL configured. Therefore, you need to update your DNS server and add the IP address for your domain.
How to test Layer 7 Load Balancer without adding it to your DNS Server
For Windows devices
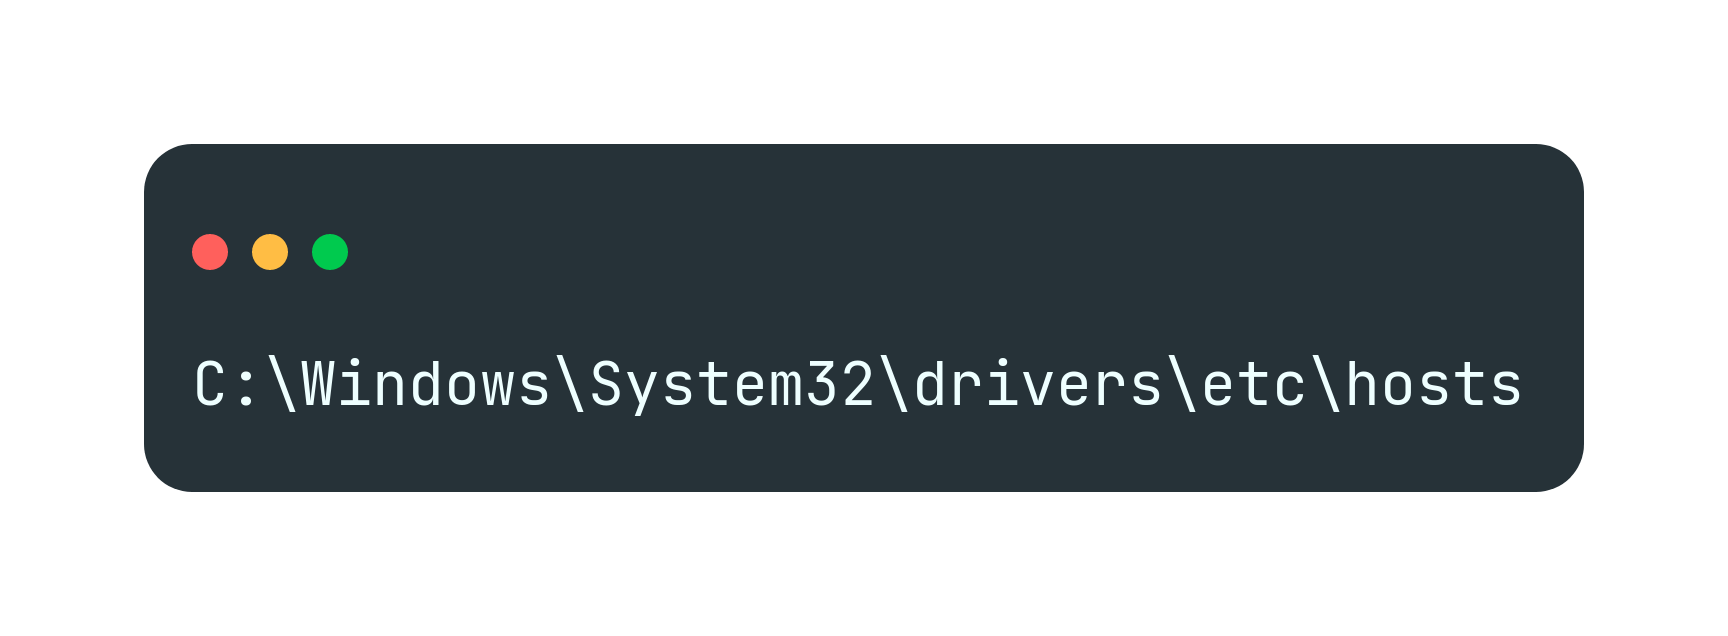
Open (as administrator) the file located at C:\Windows\System32\drivers\etc\hosts, and add a new hosts entry in the following format: "<EXTERNAL_IP> <DOMAIN_CONFIGURED>", and save the file. This action will add a local DNS entry and point your domain to the Load Balancer IP, without adding it to your DNS server.
For Linux devices
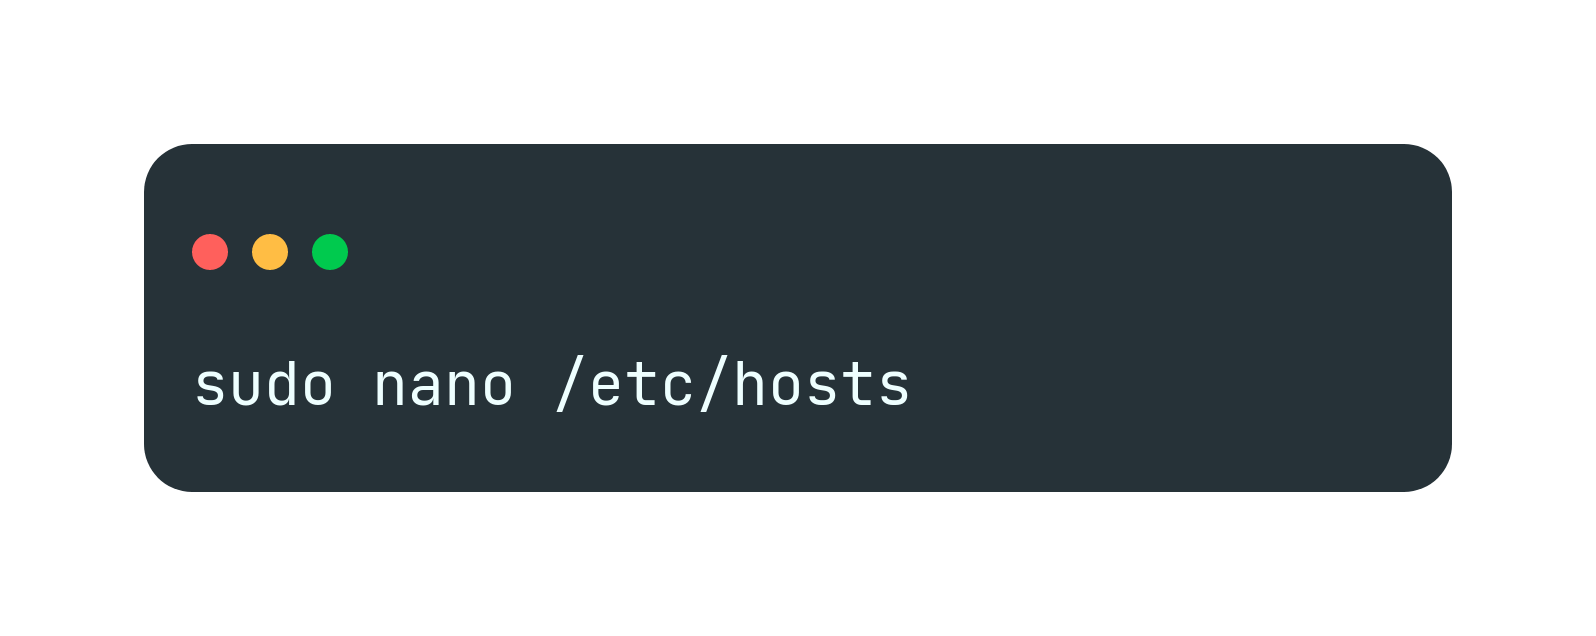
Open the /etc/hosts location ("sudo nano /etc/hosts"), and add "<EXTERNAL_IP> <DOMAIN_CONFIGURED>" to the file. Save your file, and that's it.
Set up Load Balancer on a Cluster
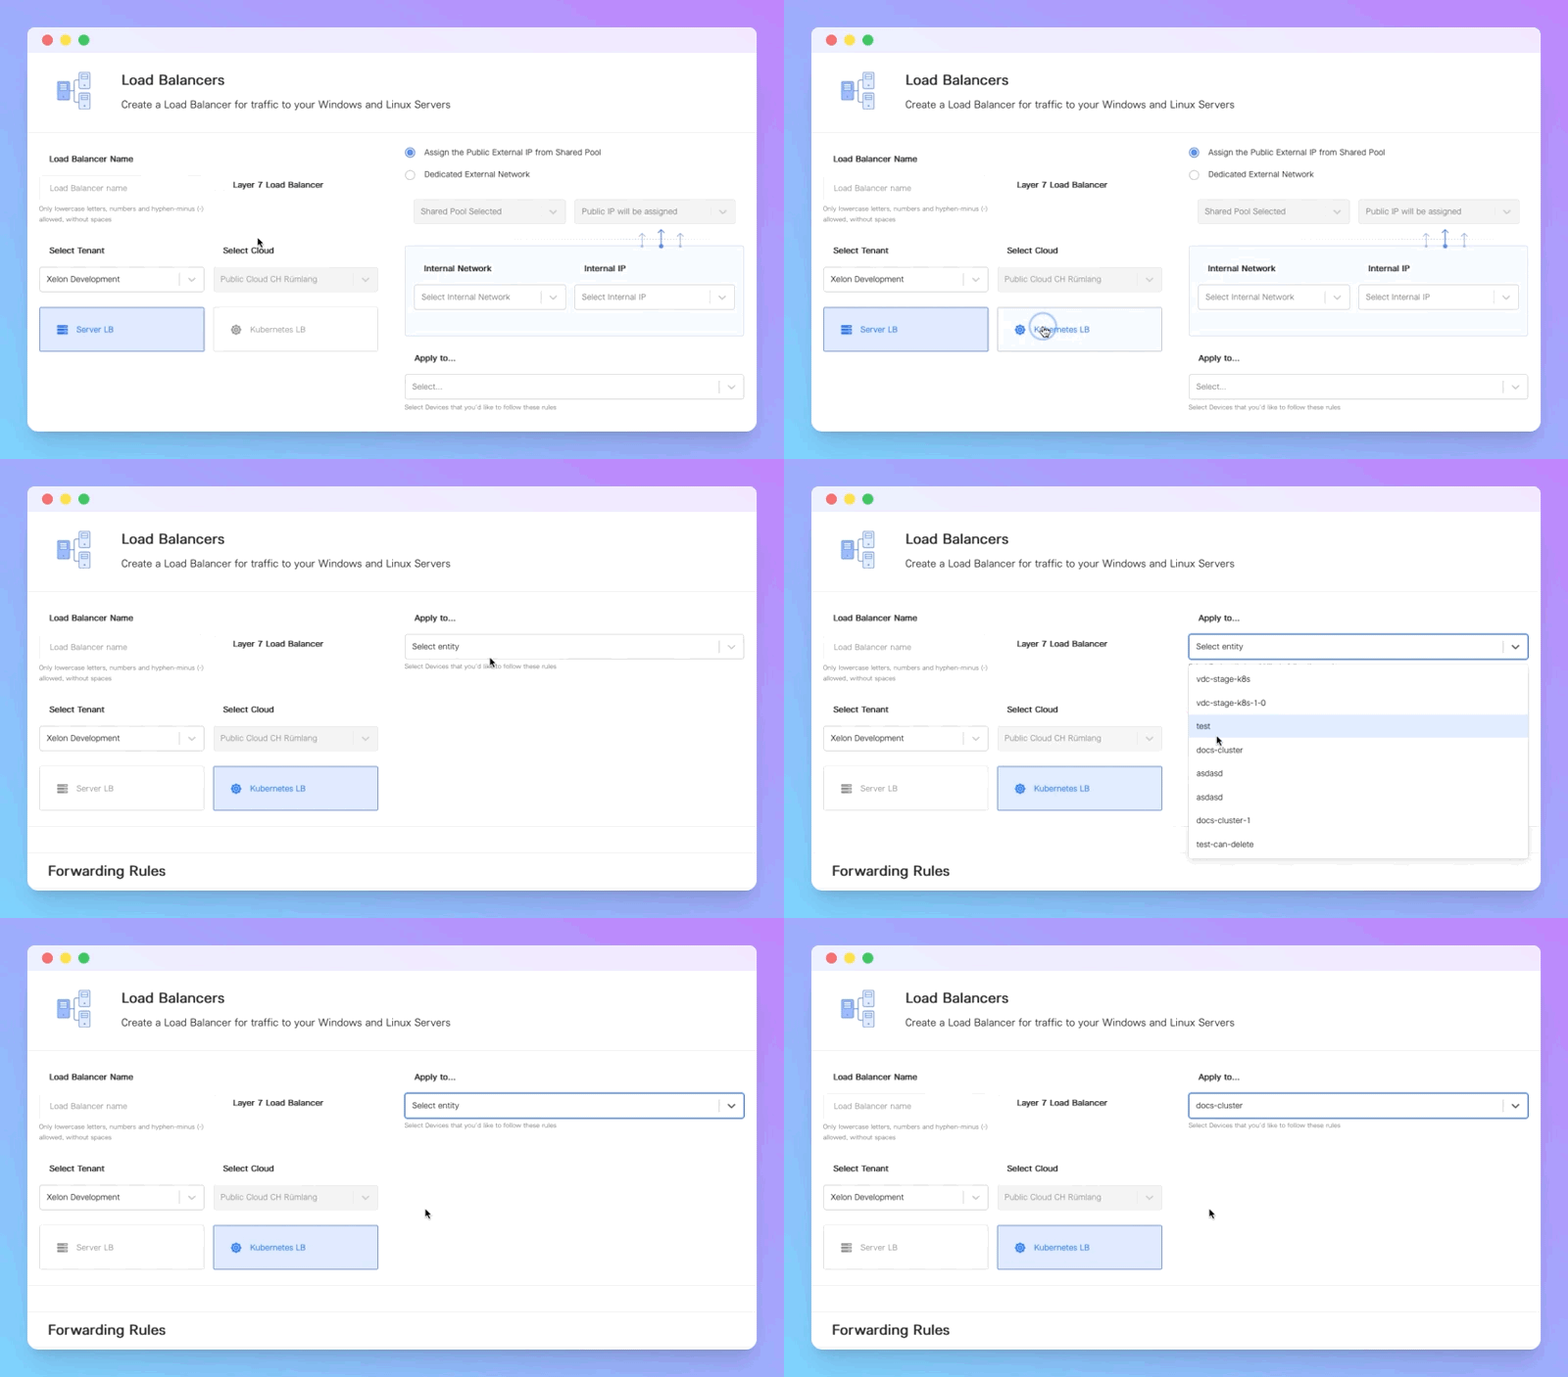
Setting up your Load Balancer on a Cluster looks almost the same as setting it up on a device. The only difference is that you need to select the Cluster device you want to link with this Load Balancer.
